September 24, 2010
How to build a plastic box for a small project |
Hardware | ||||||||||||
|
I needed a small box to house some electronic boards for a remotely controlled projection screen project I'm building. The GuruPlug computer I'm using for the project has WiFi on board but no external antenna. A metal box would severely limit the radio waves, if not shield them completely, so I decided to go with a plastic box instead. I couldn't find any plastic boxes that would fit my project, so I decided to build my own. Luckily there is a TAP Plastics store right in downtown Mountain View, and they carry a large selection of plastics. On their web site they have a lot of videos showing what can be done with plastics. It turns out you can build a box using acrylic panels very easily. Acrylic is very easy to cut holes into and you can glue the panels of the box almost as easily as you can glue paper. Check out this video showing how. Below is the finished plastic box. If you don't have the machines at home to cut the panels to length, you can have TAP Plastics cut the pieces for you. I just got a bunch of scrap plastic panels they had on sale for $1 a piece, cut them on my table saw, drilled the holes using a Dremel, and glued them together. The total cost for the box below was $2 (excluding the tools and the time used to build it :) Pictures that document the building process of the box can be found in this Picasa album.
Here are few tips when building your own box:
| |||||||||||||


September 22, 2010
Arduino and GuruPlug |
Arduino | Hardware | |
Few months ago I attempted to make an Arduino-based project accessible via a web browser and/or a phone using an Ethernet shield (see here and here). The results were a bit disappointing, as the Ethernet shield tends to behave strange when the files to be transferred are large. Everything seems to be fine if the file to be transferred is just below the Ethernet MTU (1492 bytes by default), with extremely fast transfers all the time. When the file exceeds that threshold, there are a bunch of inexplicable timeouts which make the file transfer to be seconds instead of milliseconds. I then discovered the GuruPlug. For $100 you get a full computer running on a Marvell 1.2GHz processor, with 512MB RAM and 512MB flash as the hard drive, 1 Gigabit Ethernet, 802.11 b/g and 2 USB 2.0 ports! The best part is that the GuruPlug consumes less than 5W, so you can have it on at all times. The company making the device is positioning the GuruPlug as a general purpose computer, but I think that's a mistake. I'm not going to trust such a puny computer to run my file server. However it's powerful enough to run a bunch of dedicated little applications. I've been running my home's internal DNS server for more than a year now on the previous generation SheevaPlug. Since the GuruPlug has 2 USB ports and has both Ethernet and WiFi, you can easily connect it to an Arduino and have the web server run on GuruPlug, while having the actual interface with motors and sensors done by Arduino. The communication between the two can easily happen over USB using a custom made protocol. More on the software side of things in a different post Since I want my project to go inside a single box, and not have lots of wires running around, I disassembled the GuruPlug and removed the main board. Doing so voids the warranty, so do this at your own risk! You need to provide 5V at 1A to the board. I removed the USB connectors on both the GuruPlug and the Arduino board, and ran some wires directly between them. This way I don't need to run a dedicated USB cable between the two boards. On the downside, I lost a USB port which could have been exposed outside of the box. Right now I'm in the process of building a small box for the project. Since the GuguPlug doesn't have an external WiFi antenna, I needed to build the box from plastic instead of metal. Another thing to keep in mind is that the metal part that's on top of the GuruPlug board is a heat sink that runs very hot. I'll most likely put a fan right on top of it, even though the original GuruPlug doesn't have any. More on the building of the actual box in a later post. | ||

June 16, 2010
Arduino Tiny Web Server - part 2 |
Arduino | Hardware | Open Source |
|
Update (December 30, 2010): Latest version of Arduino TinyWebServer: arduino-tinywebserver-20101230.zip. Update (December 8, 2010): The below picture of the required Arduino hardware is obsolete. Look at this newer post for updated information on the new hardware. In part 1 of the Arduino Tiny Web Server I presented some hardware modifications and changes to the Arduino Ethernet shield and the Adafruit Data Logging shield.
In this part I present the Arduino TinyWebServer library or TWS. TinyWebServer allows you to provide a Web interface to your Arduino-based project. You can get very creative with this, and add a full Ajax web interface to your project. This is possible because it's the Web browser doing all the UI work, while your Arduino board interacts with the hardware connected to it. I'm using TWS in a remotely controlled projection screen that I'm currently building to replace an existing system. The end goal is to be able to control the projection screen from an Android phone, and let my kids choose to watch movies either on TV or on the big screen. More on this is a later post, until then read below to see this works. The library has been developed on MacOS X and should most likely work fine on Linux. No guarantees about Windows, but I'd love to hear if it works for you. 
| |
As I mentioned in part 1, there are several hardware modifications, as well as software modifications that need to be made. Make sure you have those modifications done to your hardware before proceeding further.
To make things easy, I've decided to bundle the TWS library with the modifications to those libraries, as well as with two additional libraries that TWS depends on: Georg Kaindl's EthernetDHCP and Mikal Hart's Flash library.
After you download and unzip the package, copy the contents of the directory in the directory where you store your Arduino libraries.
The library comes with few examples, look in TinyWebServer/examples. The simplest one is SimpleWebServer, which shows how to write a basic HTTP server with a GET handlers. The more complex one, FileUpload shows how to implement a PUT handler to implement file uploads and write them on the SD card, and how to serve the files in GET requests.
Basic web server
To make use of the TWS library, you need to include the following your sketch:
#include <Ethernet.h>
#include <EthernetDHCP.h>
#include <Flash.h>
#include <Fat16.h>
#include <Fat16util.h>
#include <TinyWebServer.h>
EthernetDHCP is optional, but it makes acquiring an IP address a lot easier if you have a DHCP server in your network.
TWS is implemented by the TinyWebServer class. The constructor method takes two arguments. The first one is a list of handlers, functions to be invoked when a particular URL is requested by an HTTP client. The second one is a list of HTTP header names that are needed by the implementation of your handlers. More on these later.
An HTTP handler is a simple function that takes as argument a reference to the TinyWebServer object. When you create the TinyWebServer class, you need to pass in the handlers for the various URLs. Here is a simple example of a web server with a single handler.
static uint8_t mac[] = { 0xDE, 0xAD, 0xBE, 0xEF, 0xFE, 0xED };

boolean index_handler(TinyWebServer& web_server) {
  web_server.send_error_code(200);
  web_server << F("<html><body><h1>Hello World!</h1></body></html>\n");
  return true;
}

TinyWebServer::PathHandler handlers[] = {
  // Register the index_handler for GET requests on /
  {"/", TinyWebServer::GET, &index_handler },
  {NULL}, // The array has to be NULL terminated this way
};

// Create an instance of the web server. No HTTP headers are requested
// by the HTTP request handlers.
TinyWebServer web = TinyWebServer(handlers, NULL);

void setup() {
  Serial.begin(115200);
  EthernetDHCP.begin(mac);
  web.begin();
}

void loop() {
  EthernetDHCP.maintain();
  web.process();
}
In the loop() function we need the call to the process() to make sure HTTP requests are serviced. If there is no new request, the method returns immediately. Otherwise the process() method blocks until the request is handled.
For a complete working example look in TinyWebServer/example/SimpleWebServer.
Serving files from the SD card
Now that we've seen the basics, let's see how we can extend this web server to serve files stored on the SD card. The idea is to register a handler that serves any URLs. Once the handler is invoked, it interprets the URL path as a file name on the SD card and returns that.
boolean file_handler(TinyWebServer& web_server) {
  char* filename = TinyWebServer::get_file_from_path(web_server.get_path());
  if (!filename) {
    web_server.send_error_code(404);
    web_server << "Could not parse URL";
  } else {
    TinyWebServer::MimeType mime_type
      = TinyWebServer::get_mime_type_from_filename(filename);
    web_server.send_error_code(mime_type, 200);
    if (file.open(filename, O_READ)) {
      web_server.send_file(file);
      file.close();
    } else {
      web_server << "Could not find file: " << filename << "\n";
    }
    free(filename);
  }
  return true;
}
We can now register this in the handlers array:
TinyWebServer::PathHandler handlers[] = {
  {"/" "*", TinyWebServer::GET, &file_handler },
  {NULL},
};
Note how the URL for the HTTP request is specified. We want it to be /*, very much like a regular expression. However Arduino's IDE preprocessor has a bug in how it handles /* inside strings. By specifying the string as "/" "*" we avoid the bug, while letting the compiler optimize and concatenate the two strings into a single one.
The * works only at the end of a URL, anywhere else it would be interpreted as part of the URL. If the * is at the end of the URL, the code in TinyWebServer assumes the handler can process requests that match the URL prefix. For example, if the URL string was /html/* then any URL starting with /html/ would be handled by the specified handler. In our case, since we specified /*, any URL starting with / (except for the top level / URL) will invoke the specified handler.
Uploading files to the web server and store them on SD card's file system
Now wouldn't it be nice to update Arduino's Web server files using HTTP? This way we can focus on building the actual interface with the hardware, and provide just enough HTTP handlers to interact with it. After we implement a minimal user interface, we can iterate it without having to remove the SD card from the embedded project, copy the HTML, JavaScript and/or image files on a computer, and plug it back in. We could do this remotely from the computer, using a simple script.
TinyWebServer provides a simple file upload HTTP handler that uses the HTTP 1.0 PUT method. This allows you to implement an Ajax interface using XMLHttpRequest or simply use a tool like curl to implement file uploads.
Here's how you add file uploads to your Arduino web server:
TinyWebServer::PathHandler handlers[] = {
  // `put_handler' is defined in TinyWebServer
  {"/upload/" "*", TinyWebServer::PUT, &TinyWebPutHandler::put_handler },
  {"/" "*", TinyWebServer::GET, &file_handler },
  {NULL},
Note that the order in which you declare the handlers is important. The URLs are matched in the order in which they are declared.
This is where the headers array mentioned before comes into picture. The put_handler makes use of the Content-Length. To avoid unnecessary work and minimize precious memory usage, TinyWebServer does not do any header processing unless it's instructed. To do so, you need to declare an array of header names your handlers are interested in. In this case, we need to add Content-Length.
const char* headers[] = {
  "Content-Length",
  NULL
};
And we now initialize the instance of TinyWebServer like this:
TinyWebServer web = TinyWebServer(handlers, headers);
The put_handler method is really generic, it doesn't actually implement the code to write the file to disk. Instead the method relies on a user provided function that implements the actual logic. This allows you to use a different file system implementation than Fat16 or do something totally different than write the file to disk.
The user provided function take 4 parameters. The first is a reference to the TinyWebServer instance. The second is a PutAction enum which could be either START, WRITE or END. START and END are called exactly once during a PUT handler's execution, while WRITE is called multiple times. Each time the function is called with the WRITE param, the third and fourth parameters are set to a buffer and a number of bytes in this buffer that should be used.
Here is a small example of a user provided function that writes the PUT request's content to a file:
void file_uploader_handler(TinyWebServer& web_server,
			   TinyWebPutHandler::PutAction action,
			   char* buffer, int size) {
  static uint32_t start_time;

  switch (action) {
  case TinyWebPutHandler::START:
    start_time = millis();
    if (!file.isOpen()) {
      // File is not opened, create it. First obtain the desired name
      // from the request path.
      char* fname = web_server.get_file_from_path(web_server.get_path());
      if (fname) {
	Serial << "Creating " << fname << "\n";
	file.open(fname, O_CREAT | O_WRITE | O_TRUNC);
	free(fname);
      }
    }
    break;

  case TinyWebPutHandler::WRITE:
    if (file.isOpen()) {
      file.write(buffer, size);
    }
    break;

  case TinyWebPutHandler::END:
    file.sync();
    Serial << "Wrote " << file.fileSize() << " bytes in "
	   << millis() - start_time << " millis\n";
    file.close();
  }
}
To activate this user provided function, assign its address to put_handler_fn, like this:
void setup() {
  // ...

  // Assign our function to `upload_handler_fn'.
  TinyWebPutHandler::put_handler_fn = file_uploader_handler;

  // ...
}
You can now test uploading a file using curl:
curl -0 -T index.htm http://my-arduino-ip-address/upload
For a complete working example of the file upload and serving web server, look in TinyWebServer/examples/FileUpload.
Advanced topic: persistent HTTP connections
Sometimes it's useful to have an HTTP client start a request. For example, I need to be able to enter an IR learning process. This means that I cannot afford TinyWebServer's process() to block while serving my /learn request that initiated the IR learning process. Instead I want the handler of the /learn request to set a variable in the code that indicates that IR learning is active, and then return immediately.
If you noticed the HTTP handlers return a boolean. If the returned value is true, as it was the case in our examples above, the connection to the HTTP client is closed immediately. If the returned value is false the connection is left open. Your handler should save the Client object handling the HTTP connection with the original request. Your code becomes responsible with closing it when it's no longer needed.
To obtain the Client object, use the get_client() method while in the HTTP handler. You can write asynchronously to the client, to update it with the state of the web server.
In my remotely controlled projection screen application, I have another handler on /cancel that closes the /learn client forcibly. Otherwise the /learn's Client connection is closed at the end of the IR learning procedure. Since the Ethernet shield only allows for 4 maximum HTTP clients open at the same time (because of 4 maximum client sockets), in my application I allow only one /learn handler to be active at any given time.
June 15, 2010
Arduino Tiny Web Server - part 1 |
Arduino | Hardware | Open Source |
|
Update (December 8, 2010): The below information of the required Arduino hardware is obsolete and left here for informational purposes. Look at this newer post for updated information on the new hardware. Arduino TinyWebServer is a small and extensible HTTP server implementation designed to run in a limited amount of space on an Arduino Duemilanove. It uses the Ethernet Shield for network connectivity (from Sparkfun or from Adafruit), and the Adafruit Data Logging shield for storage purposes. Web pages, images and other content can be copied manually on the SD card or uploaded through the HTTP server. The latter allows you to push new versions of the web server's content without the need to remove the card, which can be a pain in embedded applications. In the first part I present some changes that have to be made to the hardware used and its accompanying software. Part two presents a small open source software library that implements the Arduino TinyWebServer. 
| |
Hardware modifications: Data Logging shield
The hardware shields need few modifications in order to work together. The cards were designed to work independently and use the default pins allocated on the hardware SPI bus (the CS, MOSI, MISO and SCK lines on the 10, 11, 12, 13 pins on an Arduino Duemilanove). When stacking the boards together they'd end up in a bus conflict and they won't work.
The conflict is solved by having the two boards use different CS pins. They can still share the MOSI, MISO and SCK lines, and if it wasn't for a buggy chip on the Ethernet shield, we'd have ended up using only 5 total digital I/O pins for the whole setup. See below for more info.
To make things easy, I chose to use a different CS pin for the Adafruit Data Logging shield: I use pin 9 as the CS pin. For this to work, first make sure you cut out the original trace that goes to pin 10, as in the picture below.

The Data Logging shield board comes unassembled. After you solder all the components on it, run a wire from the CS pin to pin 9, as shown in the picture below.

Hardware modifications: Ethernet shield
The Ethernet shield uses a Wiznet W5100 chip, which has a buggy hardware SPI implementation. In a post on Adafruit's forum, jaredforshey pointed me to this Arduino playground page which points to an easy way to fix this.
The proposed solution disables the chip' SPI part when not in use. This is done by connecting pin 8 to the lower PAD on the board, as shown below. At the same time, make sure you cut the trace leading from pin 8. This bug ends up costing us another pin, for a total of 6 I/O pins for the whole setup.

Software modifications: Fat16 library
To read and write files on an SD card, we need to be able to access a file system on the SD card. There are two main file systems used on SD cards: FAT16 and FAT32. The main differences between them are the maximum card sizes supported and more importantly, file naming conventions. FAT16 allows only the old 8.3 DOS file format and cards up to 2GB.
Arduino supports both file systems on SD cards using either of these libraries: Fat16 or SdFat. For all its limitations, FAT16' library is smaller that FAT32, so I decided to go with it.
Our Data Logging shield uses pin 9 as the CS pin. The FAT16 library assumes the CS pin used in pin 10, so we need to modify that in the code. For Arduino Duemilanove, the definition of SPI_SS_PIN in SdCard.h needs to change from 10 to 9.
Software modifications: Arduino's Ethernet library
The Ethernet library shipped with the Arduino 018 package has a bug. In the Client class in Client.h, the read() method does not differentiate between an 0xFF byte and the Ethernet hardware not having data available. This is not usually a problem if all you serve through the Web server are text files, including HTML. However for any binary file, including images, zip files etc. this however is a problem.
To fix this problem, I've added two more methods to the Client class:
  int read(uint8_t* ch);
  int read(uint8_t *buf, size_t size);
The first reads a character and puts its value at the address pointed to by ch. The method returns 1 if it succeeded reading a character, 0 otherwise (as when there is no data available). The second method fills in the value of buf with as many characters as it can, up to size. It returns the number of characters it was able to read, or 0 if none were read. Here is how they're implemented:
int16_t Client::read(uint8_t *ch) {
  if (!connected() || !available()) {
    return 0;
  }
  return recv(_sock, ch, 1);
}

int16_t Client::read(uint8_t *buf, uint16_t size) {
  uint16_t i;
  for (i = 0; i < size; i++) {
    if (!read(buf + i)) {
      break;
    }
  }
  return i;
}
The second change to the Ethernet library is in utility/spi.h, to fix the hardware bug with the Wiznet chip. This change is described on the Arduino playground page.
June 02, 2009
Maker Faire 2009 - the best festival so far |
Cool gadgets | Hardware | ||||||||||
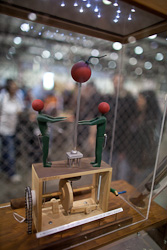
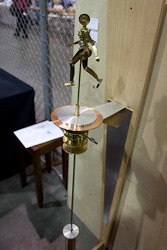
I finally had some time to go through the pictures from this year's Maker Faire. By far this was the best one so far! Lots of people participated with very interesting projects, and the variety was huge. What was striking this year was the quality of the projects and how much time people put in them. The list of projects, sorted by type can be found at the Maker Faire's web site. Here are some of the cool projects I liked:
There were a lot more interesting projects that I won't talk about in this post. Check out the Maker Fair's website for a list of participants. Also check out my Picasa album containing more pictures from the event. | |||||||||||


August 27, 2006
Make your own hardware parts |
Hardware |

Some time ago I was looking at a way to build some hardware parts for a small project I want to do at home. I found the emachineshop solution to be fairly expensive and with huge lead times, sometimes in the order of months. I did some more research into how can one like me, with only software experience and a limited understanding of mechanics, build his own parts. Learning to use an old fashioned mill to make your own parts doesn't sound too enticing: you cannot install such a machine in your garage as they tend to be really huge, heavy and noisy. The manufacturing industry is using the so-called CNC machines - Computer Numeric Control. Using relatively simple instructions in a custom programming language called RS274 (or G-code), you can tell a machine what to do. You can design a part using a CAD application, and have the application generate instructions for a specific machine in the RS274 language. The RS274 language is interpreted by a computer which then drives stepper motors on the CNC controlled machine (mill, lathe, router etc.). Usually these programs and specialized computers cost thousands of dollars. However the Linux CNC project maintains EMC, a free-software implementation of the RS274 language, that runs on a Linux system and can drive motors through a special driver attached to the parallel port. I found one company, Sherline Products, that builds and sells CNC mills and lathes driven by EMC. You can buy such a mill for less than $2,000. For the ultimate system, their 8620 package gets you a mill and a lathe for some $4000 (if you don't buy their computer). As far as software is concerned, it would be really cool to be able to draw your part in an application and see it in 3D, then tell it to generate the G-code for the machine to build it. SolidWorks appears to be one such application, although very expensive. I'm still looking for such an application, especially one running on MacOS X rather than Windows. | |
November 12, 2005
Sun Fire X2100 server |
Hardware | Linux |
|
I bought a Sun Fire X2100 server to act as a back-up for the current dual AMD server I use for hosting this site. If you decide to buy such a machine, get the basic configuration and buy the rest of the components yourself. Sun charges a lot of money for upgrades. The slim DVD internal drive is $95, but you can get one for as low as $50 (see this drive here). The default configuration ships with a 512Mb of RAM. To upgrade from 512Mb RAM to 1Gb Sun charges $270. I used the 512Mb memory DIMM which I took out of my Mac mini after I upgraded its internal memory to 1Gb. I bought two additional DIMMs to further upgrade the memory to 2Gb (2 x Kingston 512MB PC3200 400MHz 184-pin ECC Unbuffered CL3 DDR SDRAM DIMM, ~ $78 each). Upgrading to 2Gb cost me $156 instead of the hefty $590 Sun would have charged me. As for the hard drives, I got two Western Digital 160Gb SATA drives, which cost $95 each. Sun charges $150 for an 80Gb drive and $300 for a 250Gb disk! As for the operating system, don't bother getting Solaris or one of the Linux systems they offer. I downloaded and installed the AMD 64 versions of both OpenBSD and Debian, and they both work just fine. To conclude, from the savings described above, you can buy another X2100 machine! I wonder how many people are doing just this. | |
November 11, 2005
Remote controlled projection screen |
Cool gadgets | Hardware |
|
After spending two months researching, designing and implementing, I finally finished my home project: a remote controlled projection screen system. Here are some pictures of the whole system, as well as two videos, of the system extending and retracting. What was interesting in this project is that it required a lot of mechanics, electronics and programming to be implemented. Since I've never studied mechanics or electronics (OK, I actually took some basic classes in high school and university), these have been the most challenging and fun parts of the project. The basic requirement was to have the screen sit on top of the multimedia cabinet, slightly retracted. When I want to make a slide film projection, the system would extend the screen about 10" in front of the cabinet, and allow the screen to drop. The whole system would need to be remote controlled through a regular IR remote, as the cabinet is pretty tall. The basic design started by choosing the projection screen. I chose a Draper Salara matte white 84" x 84". This was the only projector I found that had the screen attachments flexible, all others had them on either side of the screen. I got the screen from projectorzone.com, the only company that allowed me to get the very basic package (screen only, no remote controls whatsoever). The next step was to design the system to perform the horizontal movement. After investigating linear actuators, I decided to go with a much simpler, home-made rack and pinion mechanism. This needs to move the projection screen horizontally about 15" (~38cm), and is powered by a small DC motor. Here is a small program in bc that I used to size the motor. The actual mathematics used in the program comes from here (look for motor selection and sizing). I bought the parts from mcmaster.com, an excellent source for mechanical parts. The DC motor, as well as most of the wires, electronic components and others I bought from jameco.com. To control the movement of the whole system, I chose to use a BasicStamp system. This component receives inputs from an IR sensor from the remote control, two limit switches to indicate when a horizontal movement should stop, and an IR emitter/receiver to limit the movement of the vertical screen. Here is the program to control the whole system. | |
September 14, 2005
Custom hardware parts on demand |
Cool gadgets | Hardware |
|
If you want to design your own parts, and have them machine-made for you, this is very interesting: emachineshop.com. You design the part using a program they provide, upload the design to their site and have the part shipped to you later. Really cool! | |
 Arduino TinyWebServer:
Apple (44)
Arduino (6)
BeagleBone (1)
Cars (5)
Cocoon (26)
Cool gadgets (14)
Emacs (24)
Google (15)
Hardware (9)
Java (31)
JavaScript (2)
Linux (12)
Music (4)
Open Source (22)
People (2)
Photo (23)
Politics (1)
Random (39)
Travel (4)
Web services (3)
Weblogs (30)
Work (1)
XSLT (12)
January 2015
January 2014
May 2013
June 2011
December 2010
September 2010
August 2010
June 2010
June 2009
May 2009
April 2009
February 2008
November 2007
July 2007
June 2007
May 2007
April 2007
October 2006
August 2006
June 2006
April 2006
March 2006
February 2006
January 2006
December 2005
November 2005
October 2005
September 2005
July 2005
June 2005
April 2005
March 2005
February 2005
October 2004
September 2004
August 2004
June 2004
May 2004
April 2004
March 2004
February 2004
January 2004
December 2003
November 2003
October 2003
September 2003
August 2003
July 2003
June 2003
May 2003
April 2003
March 2003
February 2003
January 2003
December 2002
November 2002
October 2002
September 2002
August 2002
July 2002
June 2002


